Growth99+ provides multiple methods for generating and managing leads. While the Contact Form is the primary source of new leads, the Contact Dashboard also allows you to upload an Excel file to add existing or historical leads that are not already available in your Growth99+ business account.
When to Use Lead Import
Use the lead import feature to:
- Upload existing or historical lead records in bulk.
- Migrate leads from another system.
- Quickly populate your Growth99+ account with past data.
Prerequisites
Before uploading the file, ensure that:
- The file format is .xlsx only.
- The Excel file contains only one sheet.
- Column headers and data follow the exact format described below.
Step 1: Prepare the Excel File
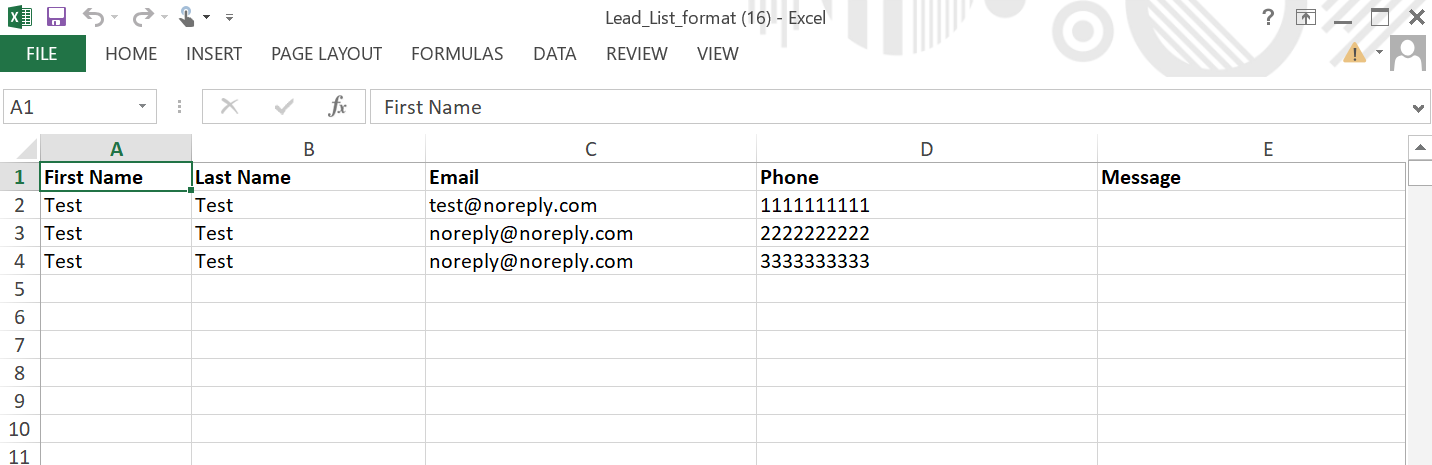
Growth99+ accepts only .xlsx files. The file structure, column names, and data format must match the required format for a successful import.
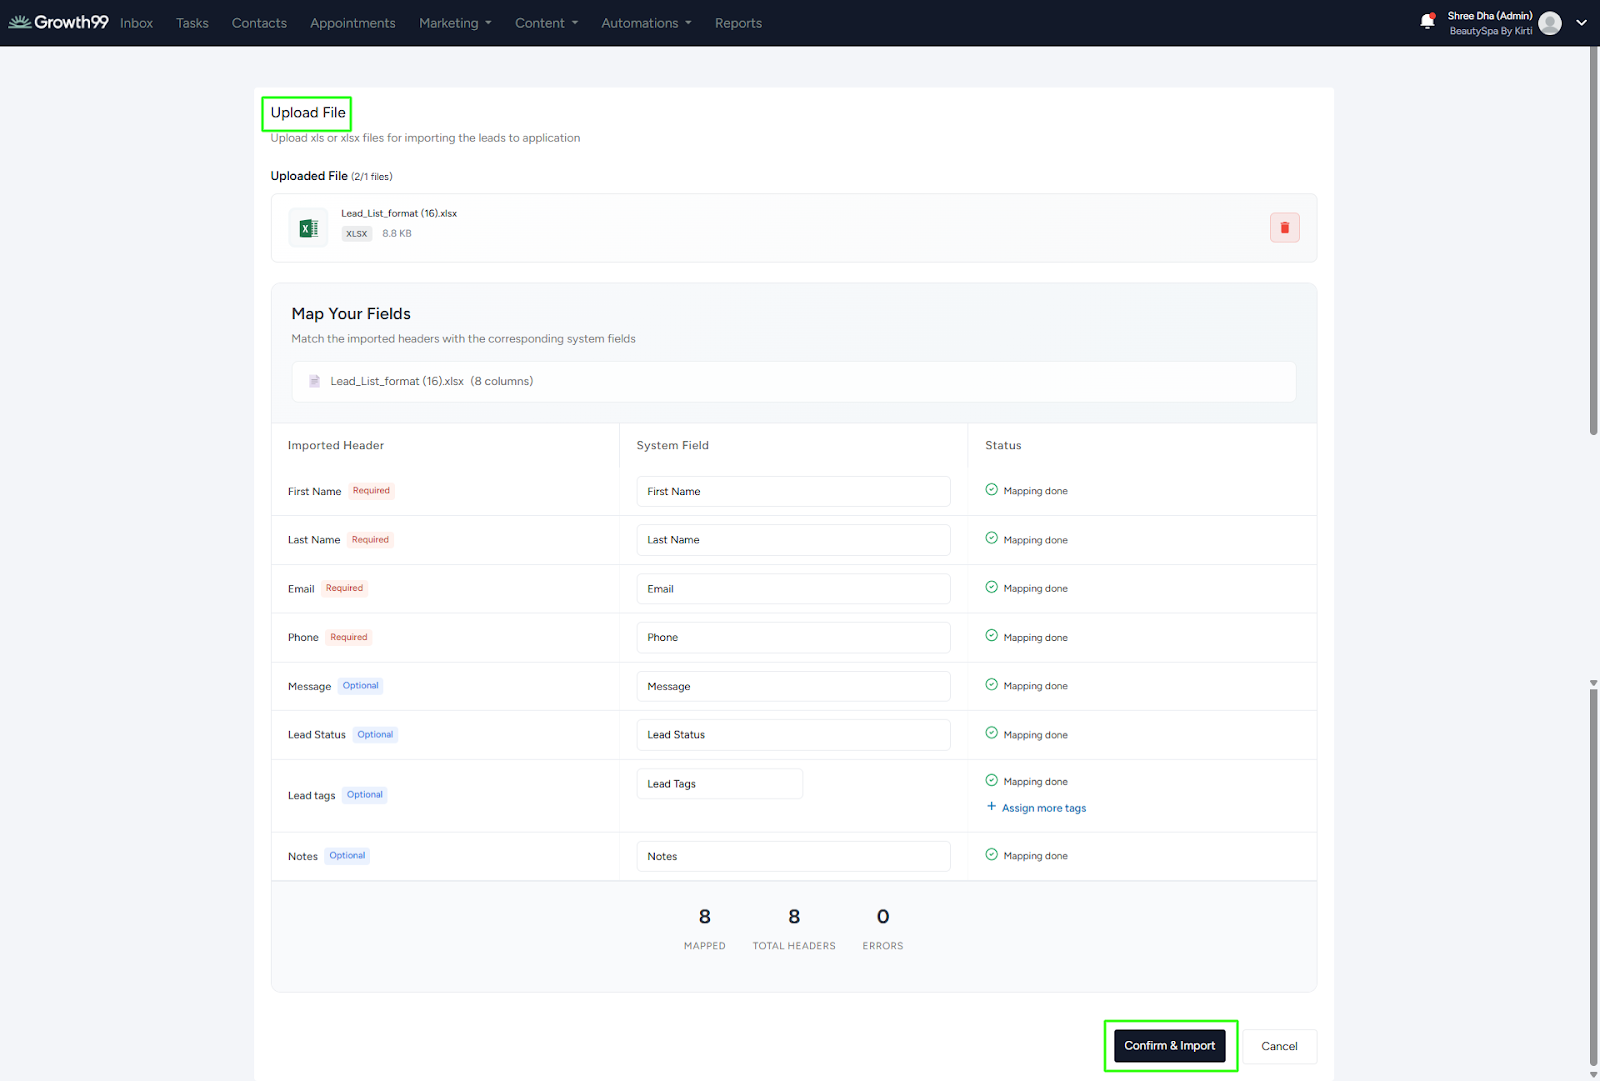
Required Column Headers
The column names must match exactly as listed:
- First Name (Mandatory)
- Last Name (Mandatory)
- Email (Mandatory)
- Phone (Mandatory)
- Message (Optional)
- Lead Status (Optional)
- Lead Tags (Optional)
- Notes (Optional)
Note: The first four columns (First Name, Last Name, Email, Phone) are mandatory.
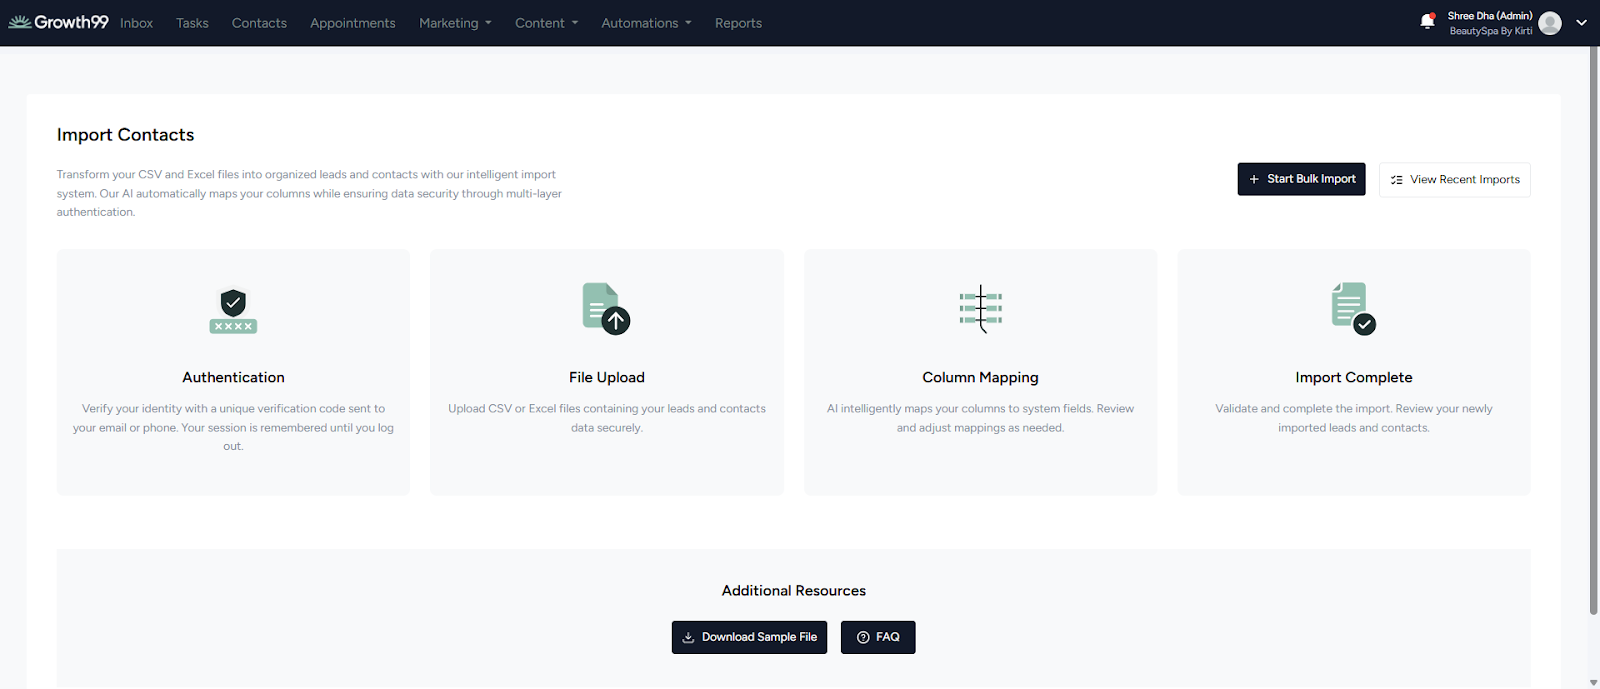
Download Sample Excel Format
You can download the predefined Excel template directly from the Growth99+ application.
Important :
The downloaded file contains dummy data in the first three rows. Delete the first three rows before adding your actual lead data.
Phone Number Guidelines
- Enter only 10-digit phone numbers.
- If the phone number is missing, the system automatically assigns 9999999999
- Phone numbers with fewer or more than 10 digits will fail to import
- You will receive an email report listing all failed leads due to invalid phone numbers.
Recommended actions for invalid numbers:
- Correct the phone number to 10 digits and re-import, or
- Remove the phone number and leave the field blank to allow email-only import.
Email Guidelines
- If the email address is missing, the system automatically assigns: noreply@noreply.com
Notes & Tags
- Use the "Notes" column to add additional information (e.g., DOB, remarks, comments)
- Use the "Lead Tags" column to categorize leads.
- If the tag does not already exist, the system automatically creates it during the import process.
File Validation Checklist
Before uploading, confirm that:
✔ File format is .xlsx
✔ The file contains only one sheet
✔ Column headers match exactly
✔ Phone numbers are 10 digits or left blank
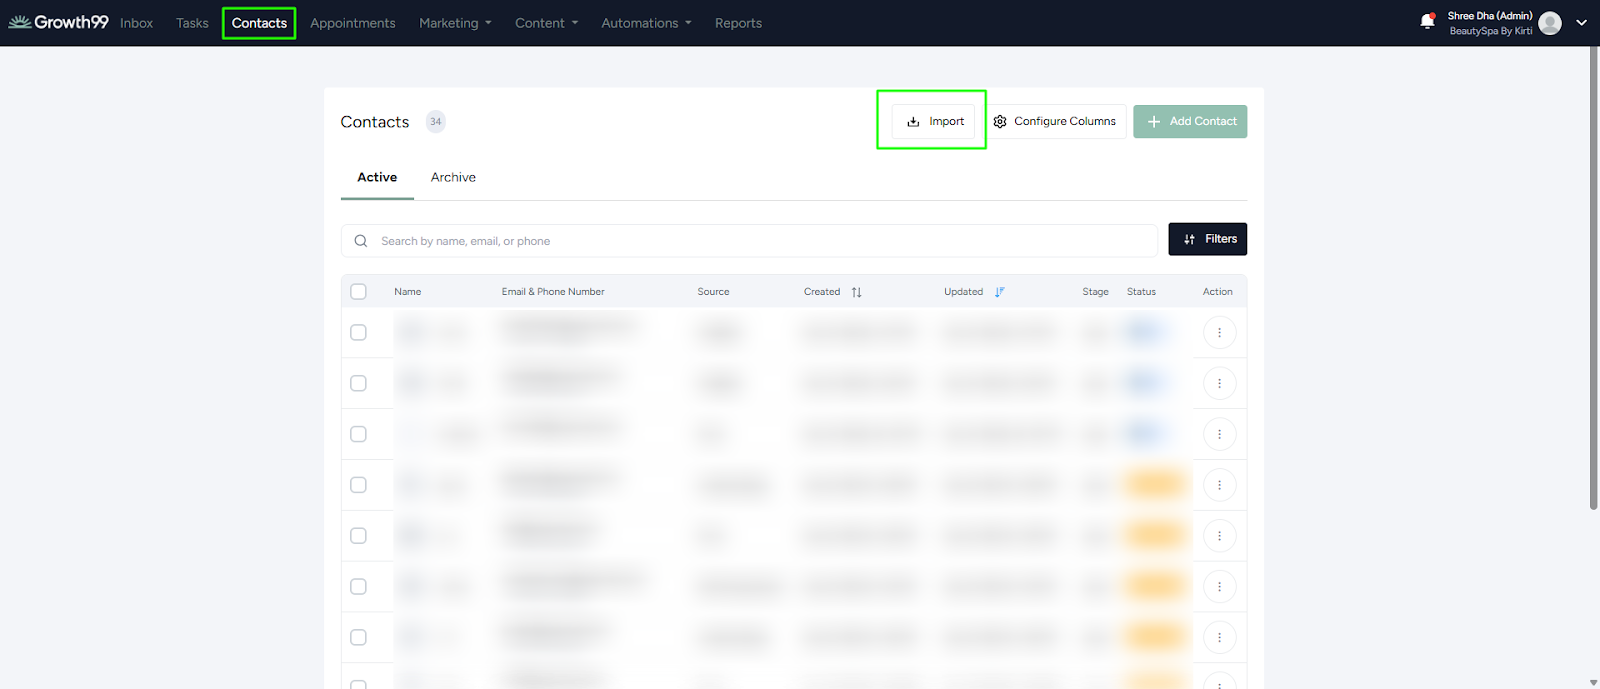
Step 2: Navigate to the Import Page
- Log in to your Growth99+ account.
- Click "Contacts" from the sidebar.
- Click "Import."
Step 3: Open the Import Screen
- Click the "Import" button on the "Contact Import" page.
- The import screen will open.
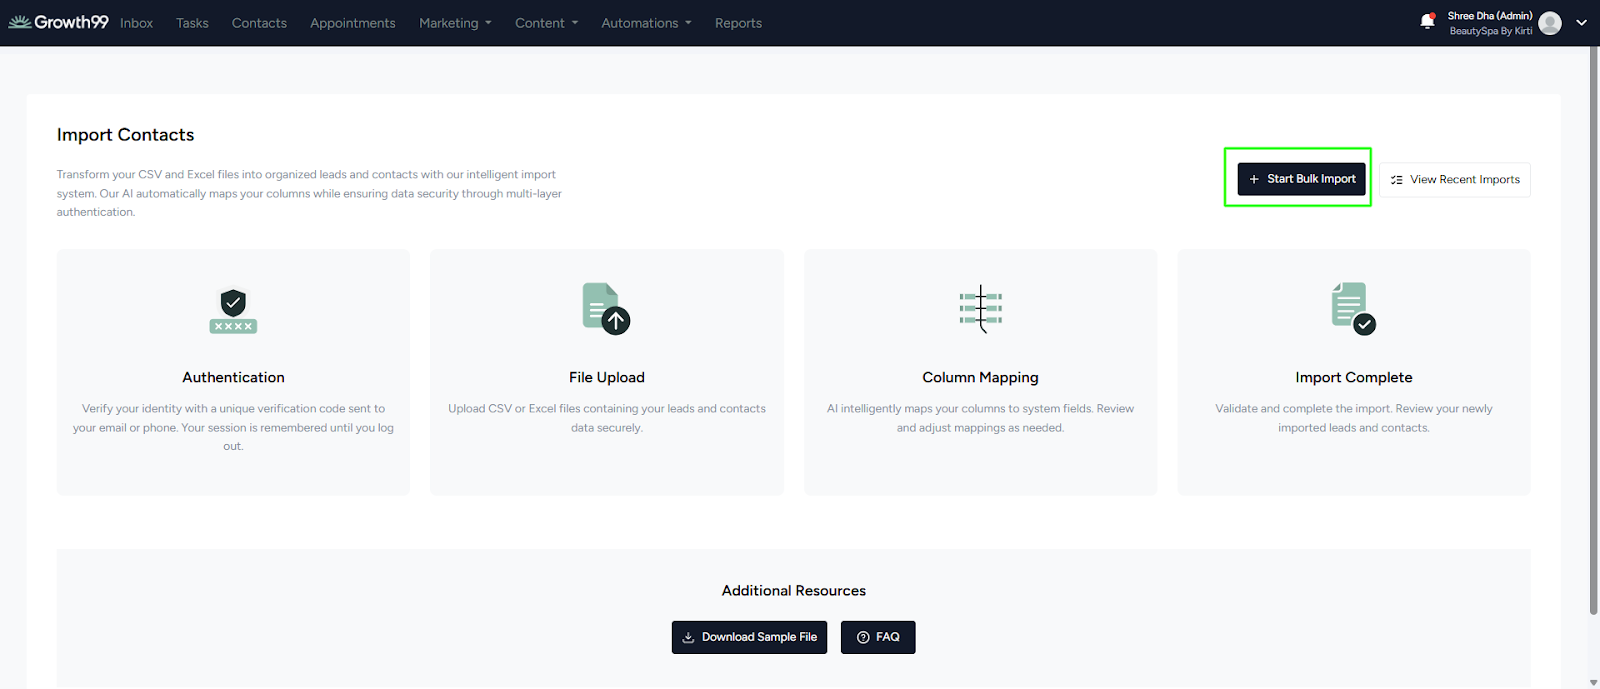
Step 4: Start the Import Process
- Click "Start Bulk Import."
- Verify your identity before proceeding.
- A verification code will be sent to your registered mobile number.
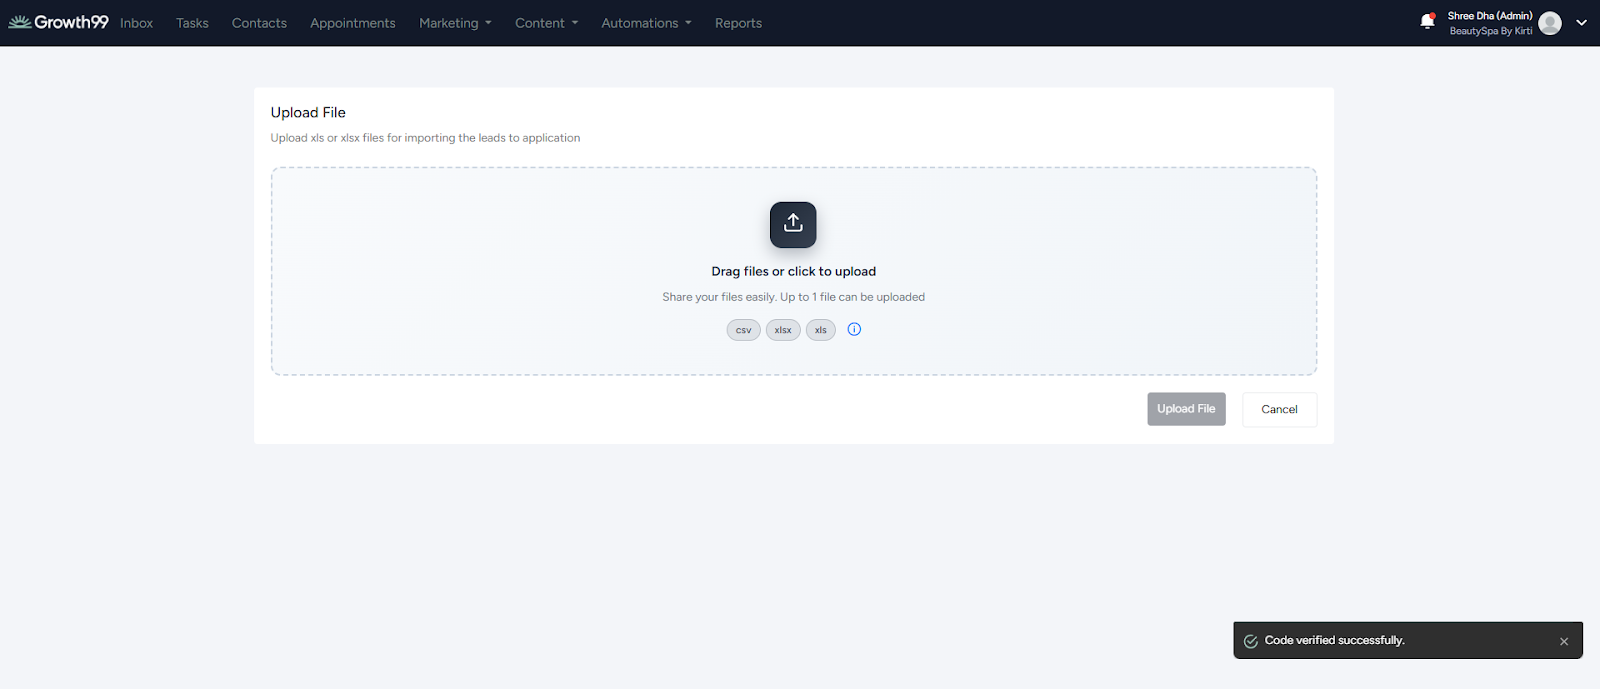
Step 5: Upload the Excel File
- A file upload dialog will appear.
- Select the prepared .xlsx file from your device.
Step 6: Confirm and Complete Import
- Wait a few seconds for the file to upload.
- The system will automatically map the data. Once mapping is complete, the "Confirm" and "Import" button will be enabled.

- After a successful import, you will see the message: “Import process completed successfully.”
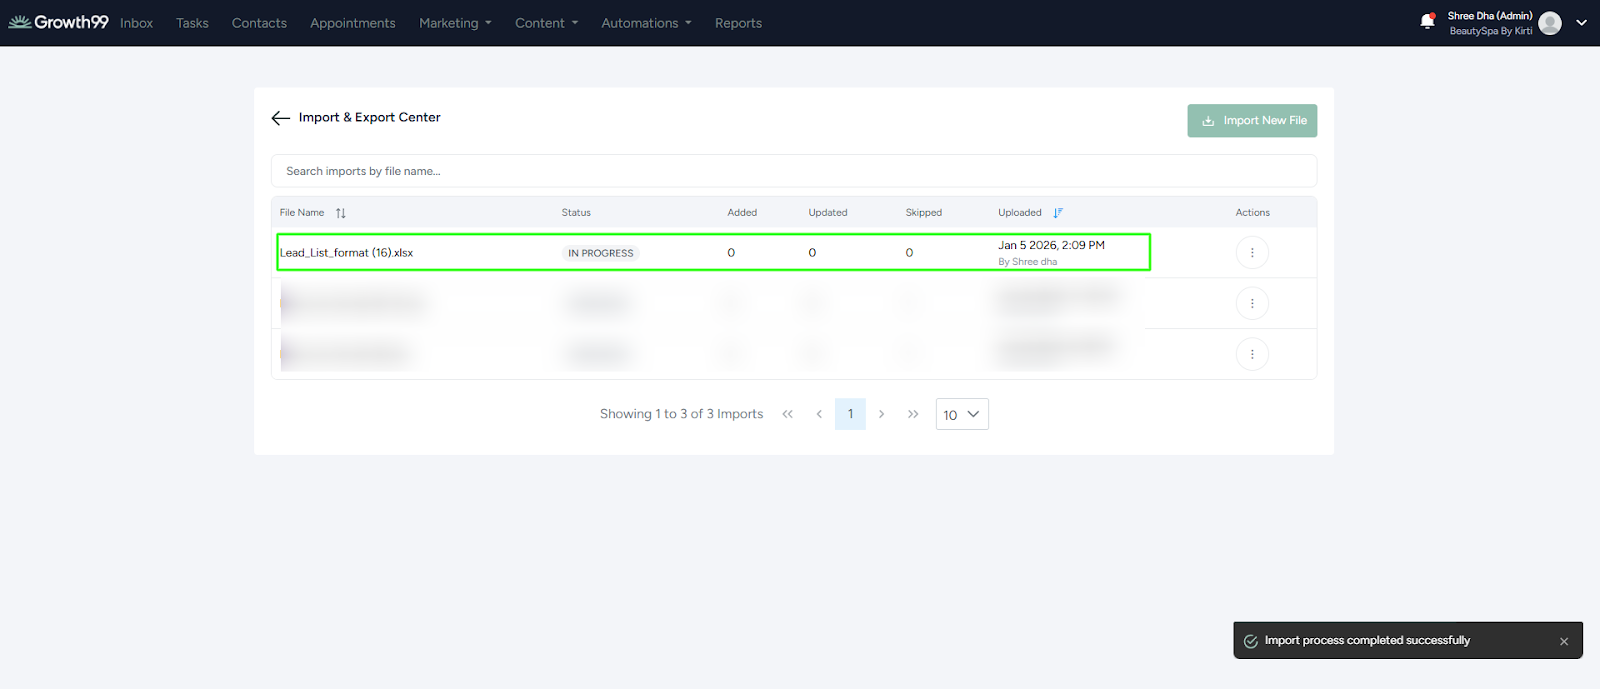
- A confirmation email will be sent to the registered email address once the lead upload is complete.

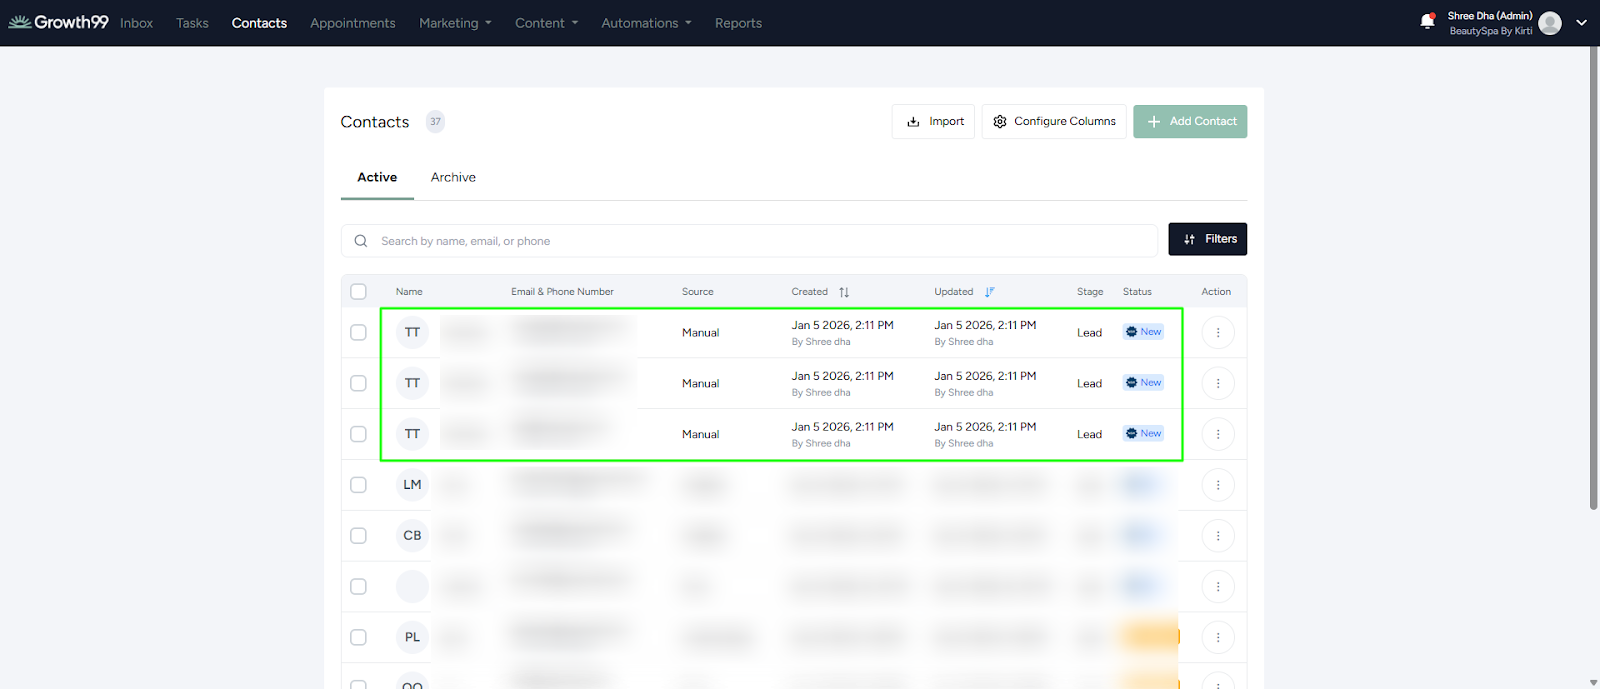
Final Result
That’s it! Your leads will now appear in the leads list with the source marked as "Manual."
Important Notes
- Leads uploaded via bulk import do not receive email notifications by default.
- Emails will be sent only if triggers are configured for manual leads.
Summary
- Use bulk import to upload a large number of leads at once.
- Follow the required Excel format strictly.
- Validate phone numbers and emails before uploading.
- Configure triggers if automated emails are required.
For additional help, refer to the Manual Lead Creation and Trigger Configuration guides within the Growth99+ product.