1. What This Feature Does
This automation helps businesses:
- Maintain accurate lead statuses without manual updates.
- Instantly identify leads as "New," "Pending," "Warm," "Hot," "Cold," "Inactive," or "Junk."
- Ensure that engaged leads are never overlooked.
2. Where to Find Lead Status Automation
Access "Lead Status Automation":
- Log in to the Growth99 marketing automation platform.
- From the main navigation menu, go to "Automations."
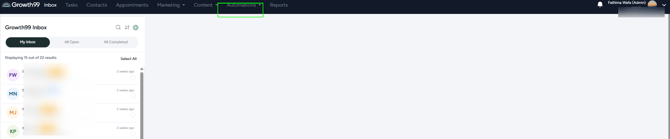
- Click "Lead Status Automation."
 You will be directed to the Lead Status Automation screen.
3. Enabling Lead Status Automation
-
By default, "Lead Status Automation" is turned off.
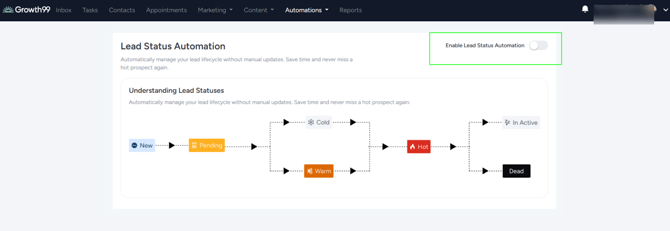
To enable it:
- On the "Lead Status Automation" page, locate the "Enable Lead Status Automation" toggle.
- Turn the toggle "ON."
Once enabled:
- Six default automation rules are created.
- All six rules are automatically enabled.
- You can disable any rule individually, if required
 .
.
4. Default Automation Rules
When "Lead Status Automation" is enabled, the following six rules are created and activated:
1. New → Pending
When the system or a staff member sends an SMS or email (excluding default “thank you” or “subscription confirmation” messages), the lead moves from "New" to "Pending."
2. Pending → Warm
When a contact replies to any SMS or email outreach, the lead moves from "Pending" to "Warm."
3. Warm → Hot
When a contact sends the configured number of responses within the defined time period while in "Warm" status, the system moves the lead to "Hot."
Example: Two responses within seven days.
4. Pending → Cold
If a contact remains unresponsive for the configured number of days while in "Pending" status, the lead’s status is updated to "Cold."
5. Cold → Warm
When a previously cold lead responds or meets the configured trigger conditions, the lead moves from "Cold" to "Warm."
6. Any → Junk
When a lead is manually marked as "Junk" (for example, spam, a wrong number, or a fake lead), the lead’s status changes to "Junk" regardless of its current status.
This status represents a final end state for invalid or unwanted leads.
-
Note: All six rules are enabled by default. You can disable any rule at any time.
5. Enabling or Disabling Individual Rules
To manage individual rules:
- Go to "Automations" → "Lead Status Automation."
- Scroll to the list of default rules.
- Each rule includes an "ON/OFF" toggle.
- Turn the toggle "OFF" to disable a rule.
This allows you to customize automation based on your workflow. For example, you may keep "New" → "Pending" and "Pending" → "Warm," but disable "Cold" → "Warm" if you prefer to manage re-engagement manually.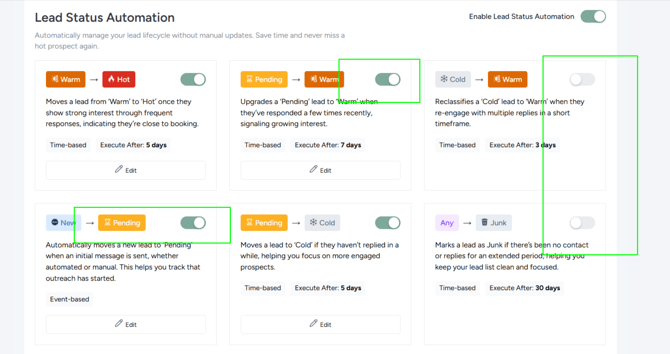
6. Editing an Automation Rule
Each automation rule can be customized to match your team’s process.
To edit a rule:
- Go to "Automations" → "Lead Status Automation."
- Find the rule you want to update (for example, "Warm" to "Hot").
- Click "Edit."
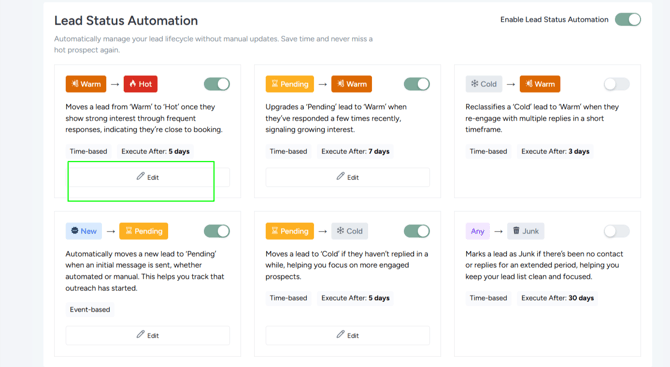
- The "Edit Rule" configuration panel opens.
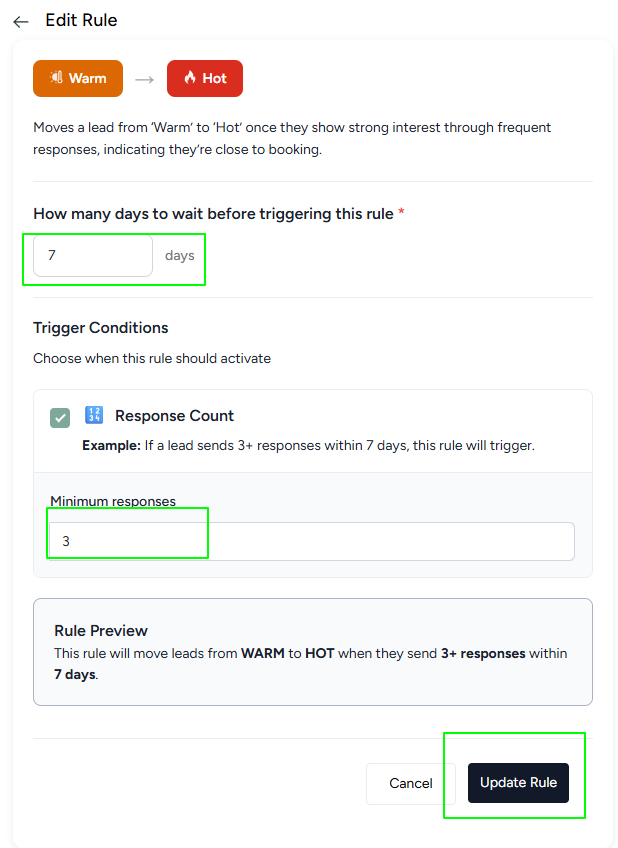
Within the "Edit Rule" screen, you can configure "Days" to wait before triggering and "Response" count thresholds
7. Using the Rule Preview
While editing a rule, a "Rule Preview" is displayed in plain language.
Example Preview:
“If a lead is in 'Warm' status and sends two responses within seven days, change the status to 'Hot.'”
Always review this preview to confirm that the rule logic matches your intent before saving.
8. Saving the Rule and Confirmation Message
After updating a rule:
- Review the "Rule Preview" to ensure it reflects your intended behavior.
- Click "Update Rule" (or "Save") at the bottom of the page.

- A "Success" message confirms that the rule has been updated.
The updated rule takes effect immediately for all future triggers.
9. How Automation Works in the Background (High-Level Overview)
Once "Lead Status Automation" is enabled and configured:
- System or staff messages can trigger rules such as "New" → "Pending."
- Incoming SMS or email replies can trigger "Pending" → "Warm," "Cold" → "Warm," or "Warm" → "Hot," based on rule configuration.
- If a contact does not respond within the configured number of days while in "Pending" status, the system moves the lead from "Pending" to "Cold."
- Manually marking a lead as "Junk" triggers the "Any" → "Junk" rule.
All lead status changes are logged with timestamps and trigger details (for example, “Moved from Pending to Warm – contact replied via SMS”).
10. Best Practices
- Start with default rules: Observe real engagement behavior before adjusting thresholds.
- Align "Cold" timing with your sales cycle: Short cycles may use 7–10 days, while longer cycles may require 14–30 days.
- Use "Warm" → "Hot" strategically: Configure response thresholds to surface genuinely engaged leads.
- Audit "Junk" leads regularly: Ensure only invalid or unwanted contacts are marked as "Junk" to maintain accurate reporting.