
Overview
The Decoda Health integration keeps your patient data in sync between Decoda and Growth99+ — both ways. Incoming data moves new and updated patients from Decoda into Growth99+, and outgoing data pushes your Growth99+ contacts into Decoda. Setup takes four short steps inside both platforms.
Before you start, make sure you have:
- Admin access to your Growth99+ account
- Admin access to your Decoda Health account
Step 1: Access the Decoda integration in Growth99+
- Log in to Growth99+ at app.growth99.com.
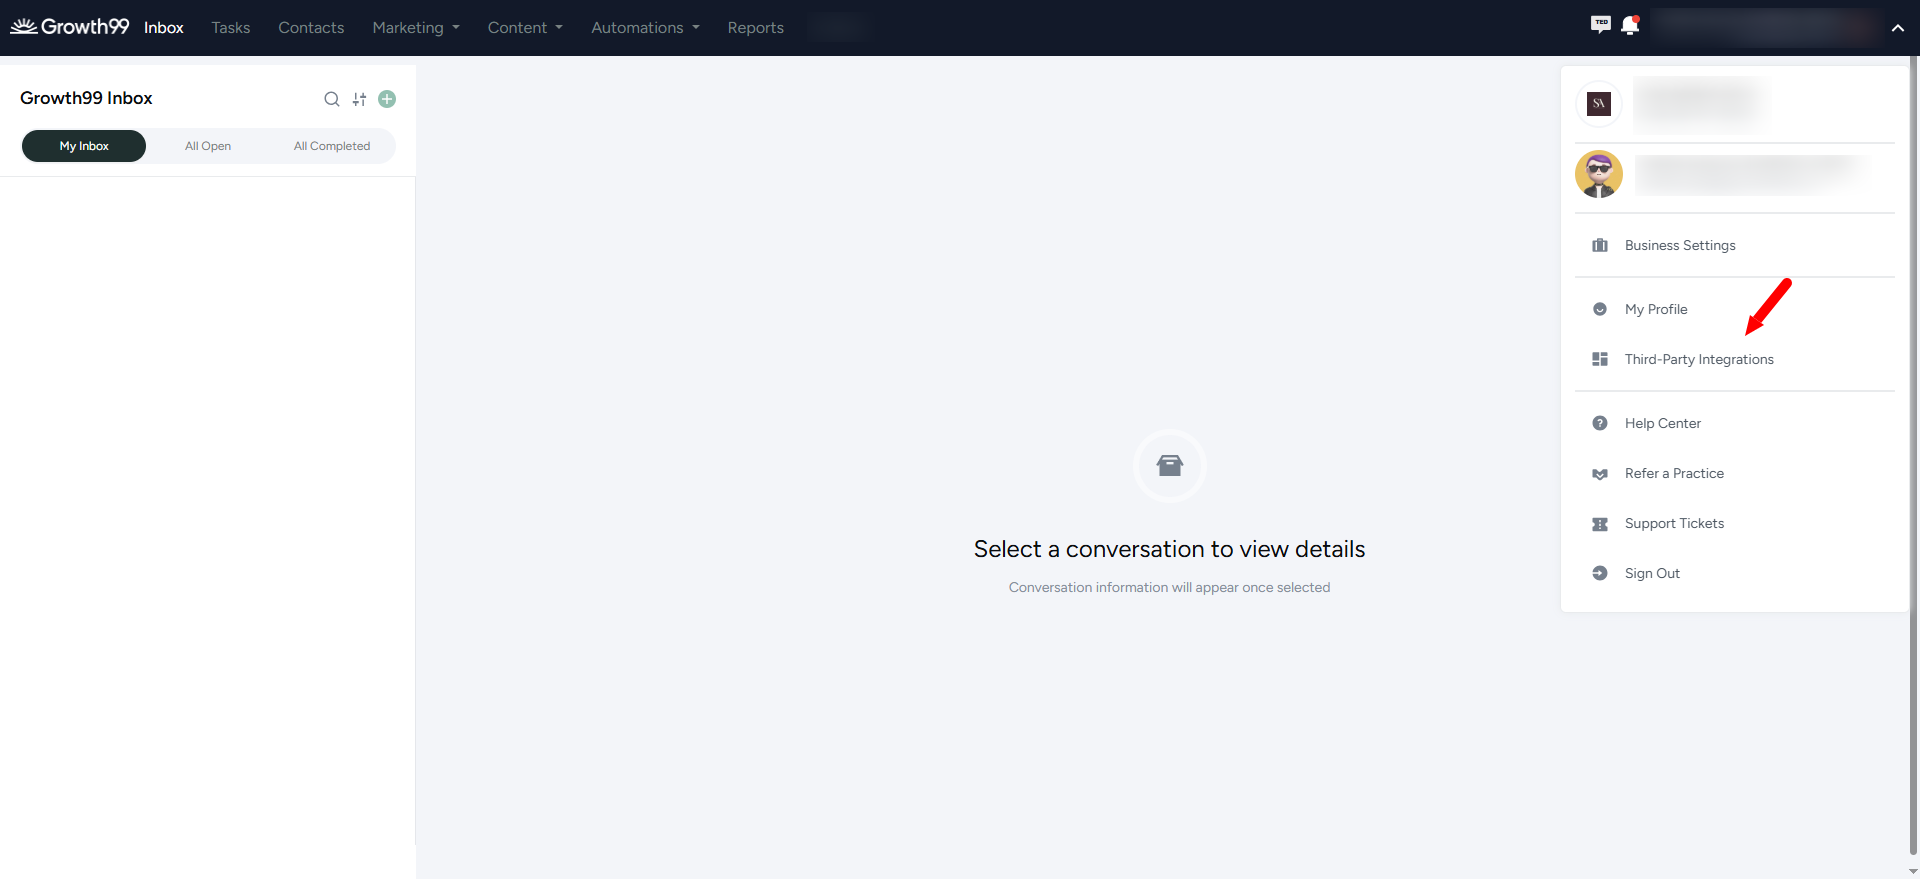
- Navigate to your profile to access the integration settings.
- Click Third-Party Integrations.
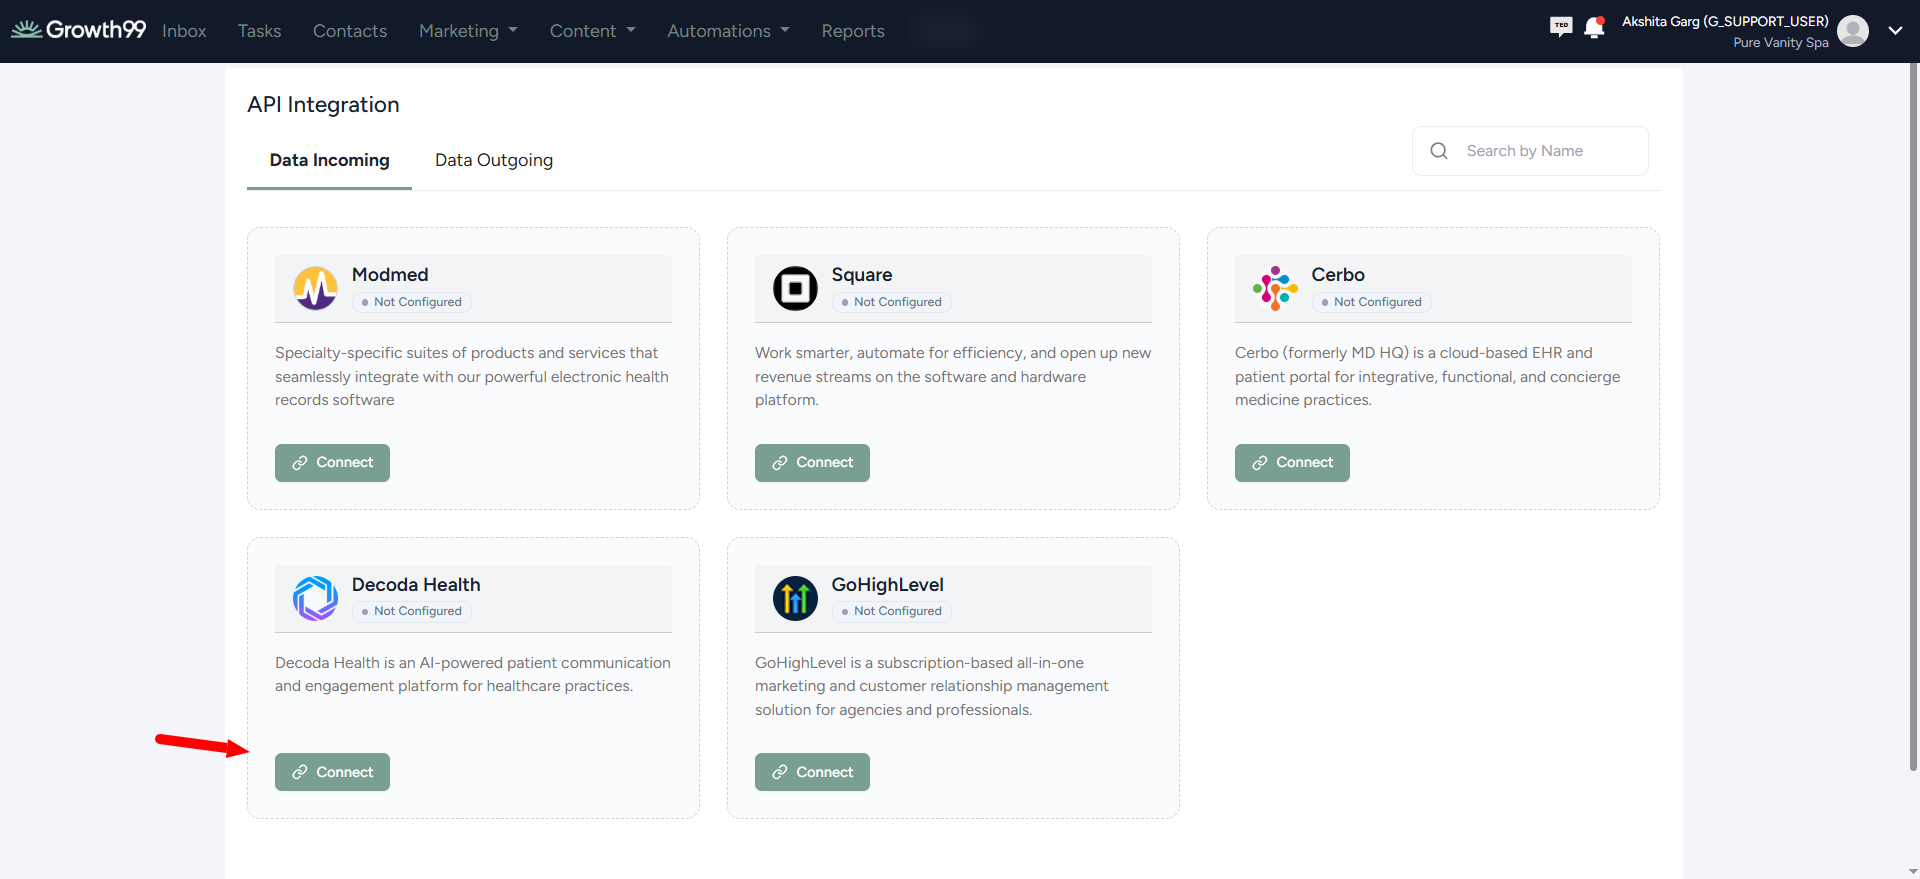
- Under API Integration, Decoda Health is available in both the Data Incoming and Data Outgoing tabs. Scroll down to find Decoda Health and click Connect.
Step 2: Set up incoming data from Decoda
This is how patients move from Decoda into Growth99+.
- In the Data Incoming tab, click Connect for Decoda Health. The Decoda Health integration page will open with the webhook details displayed.
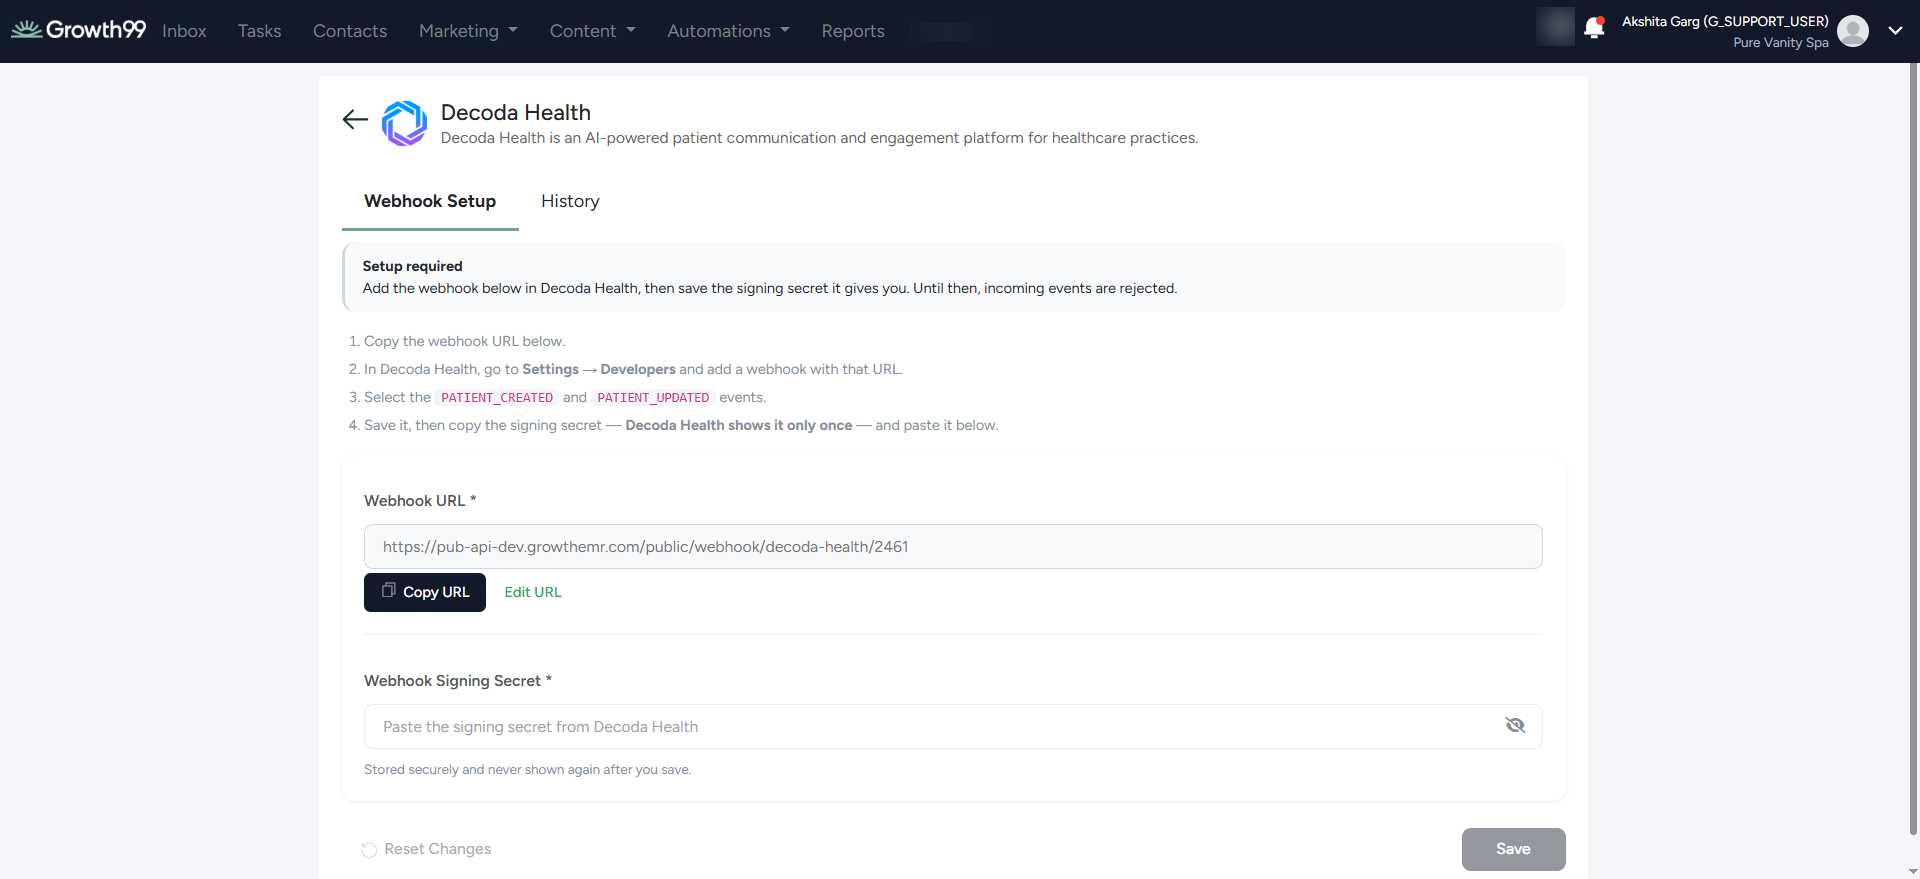
- Copy the webhook URL shown on the page — you'll paste it into Decoda in the next step.
- In Decoda Health, go to Settings → Developers → API & Webhooks and click Add webhook. Paste the URL you just copied.
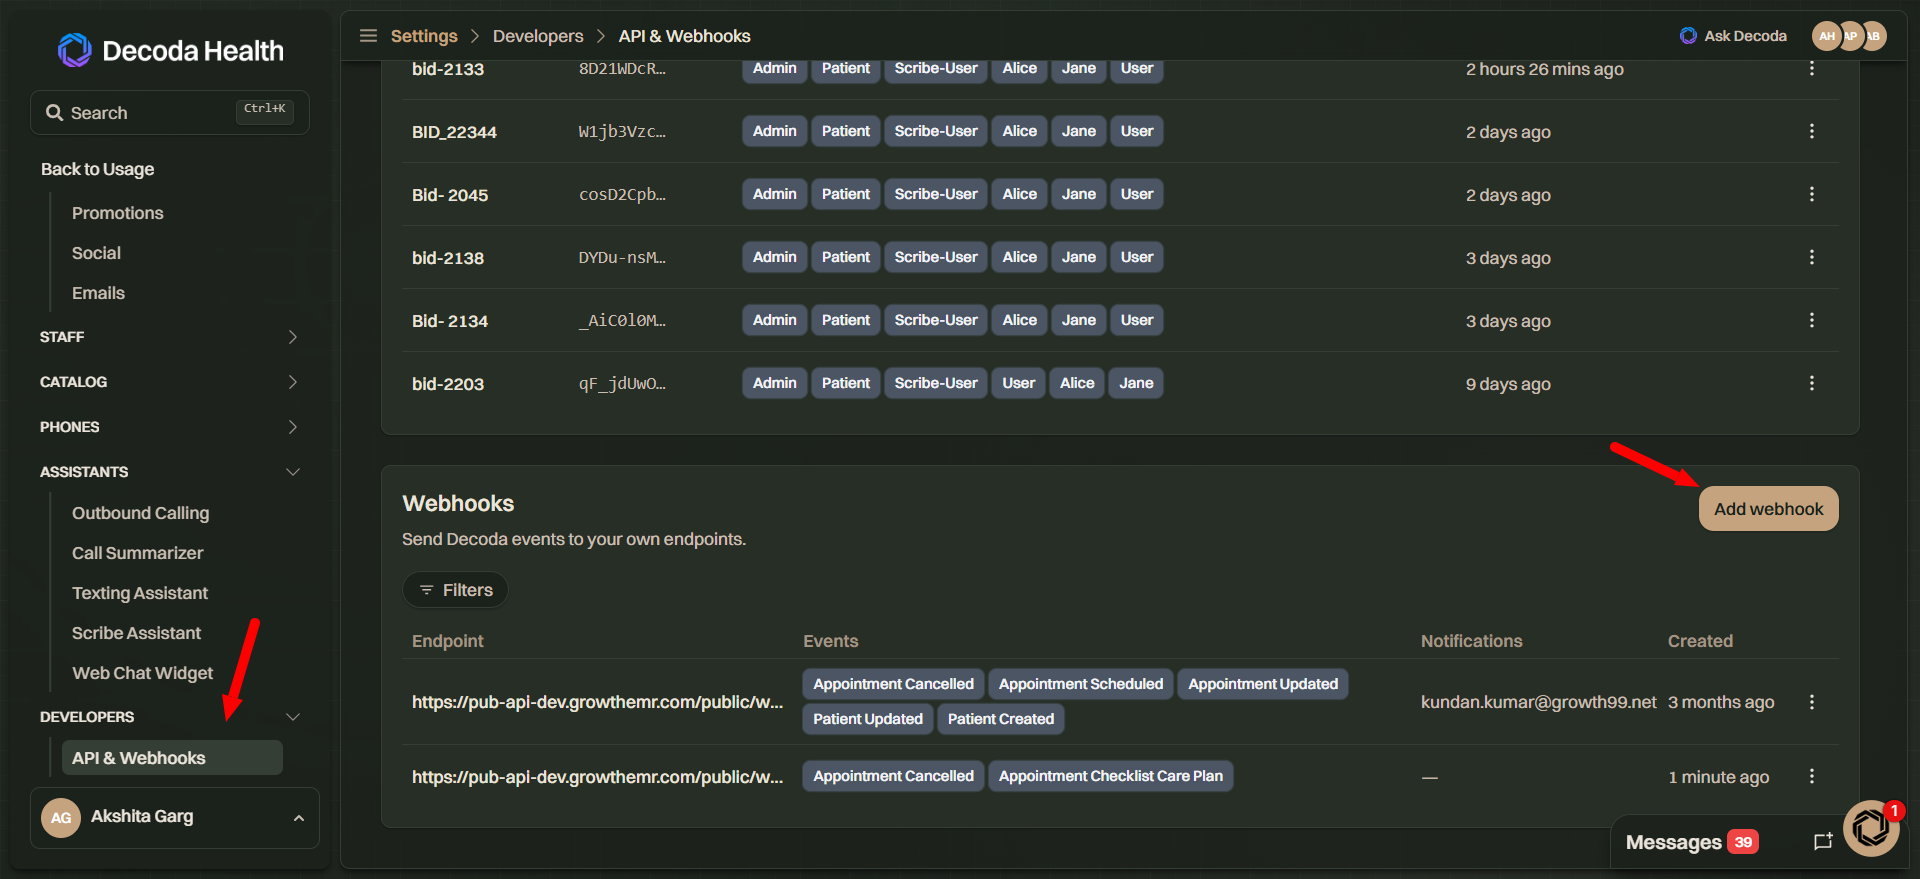
- Under Subscriptions, select the PATIENT_CREATED and PATIENT_UPDATED events.
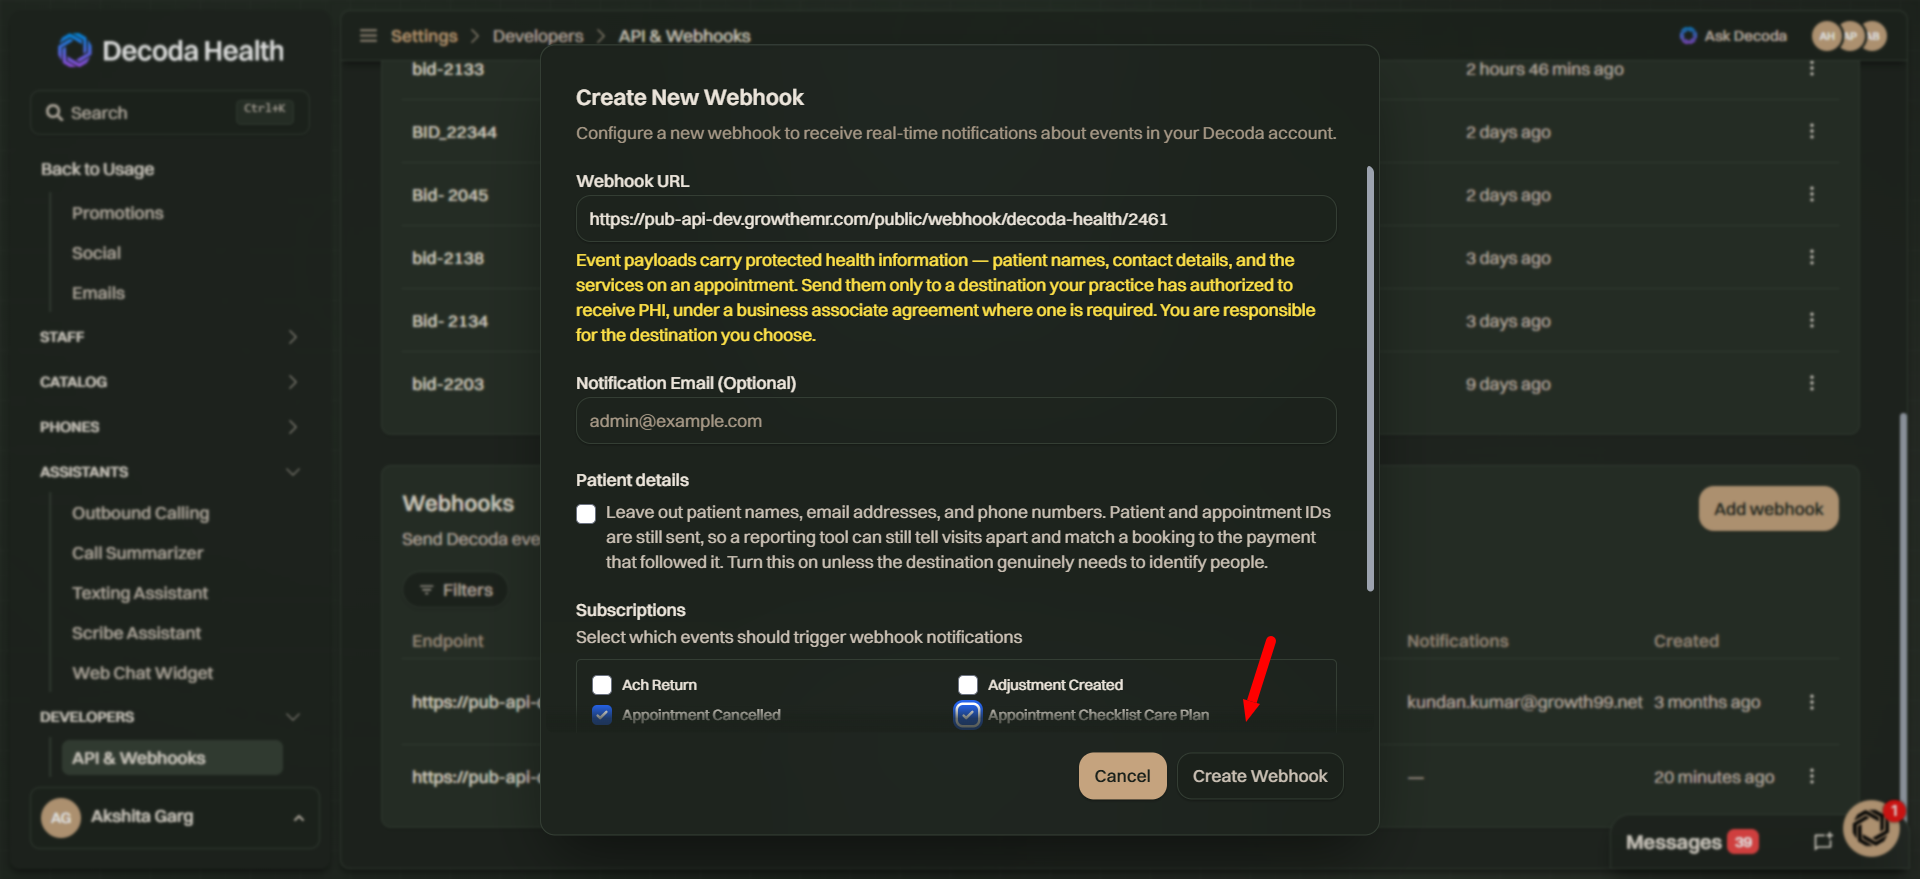
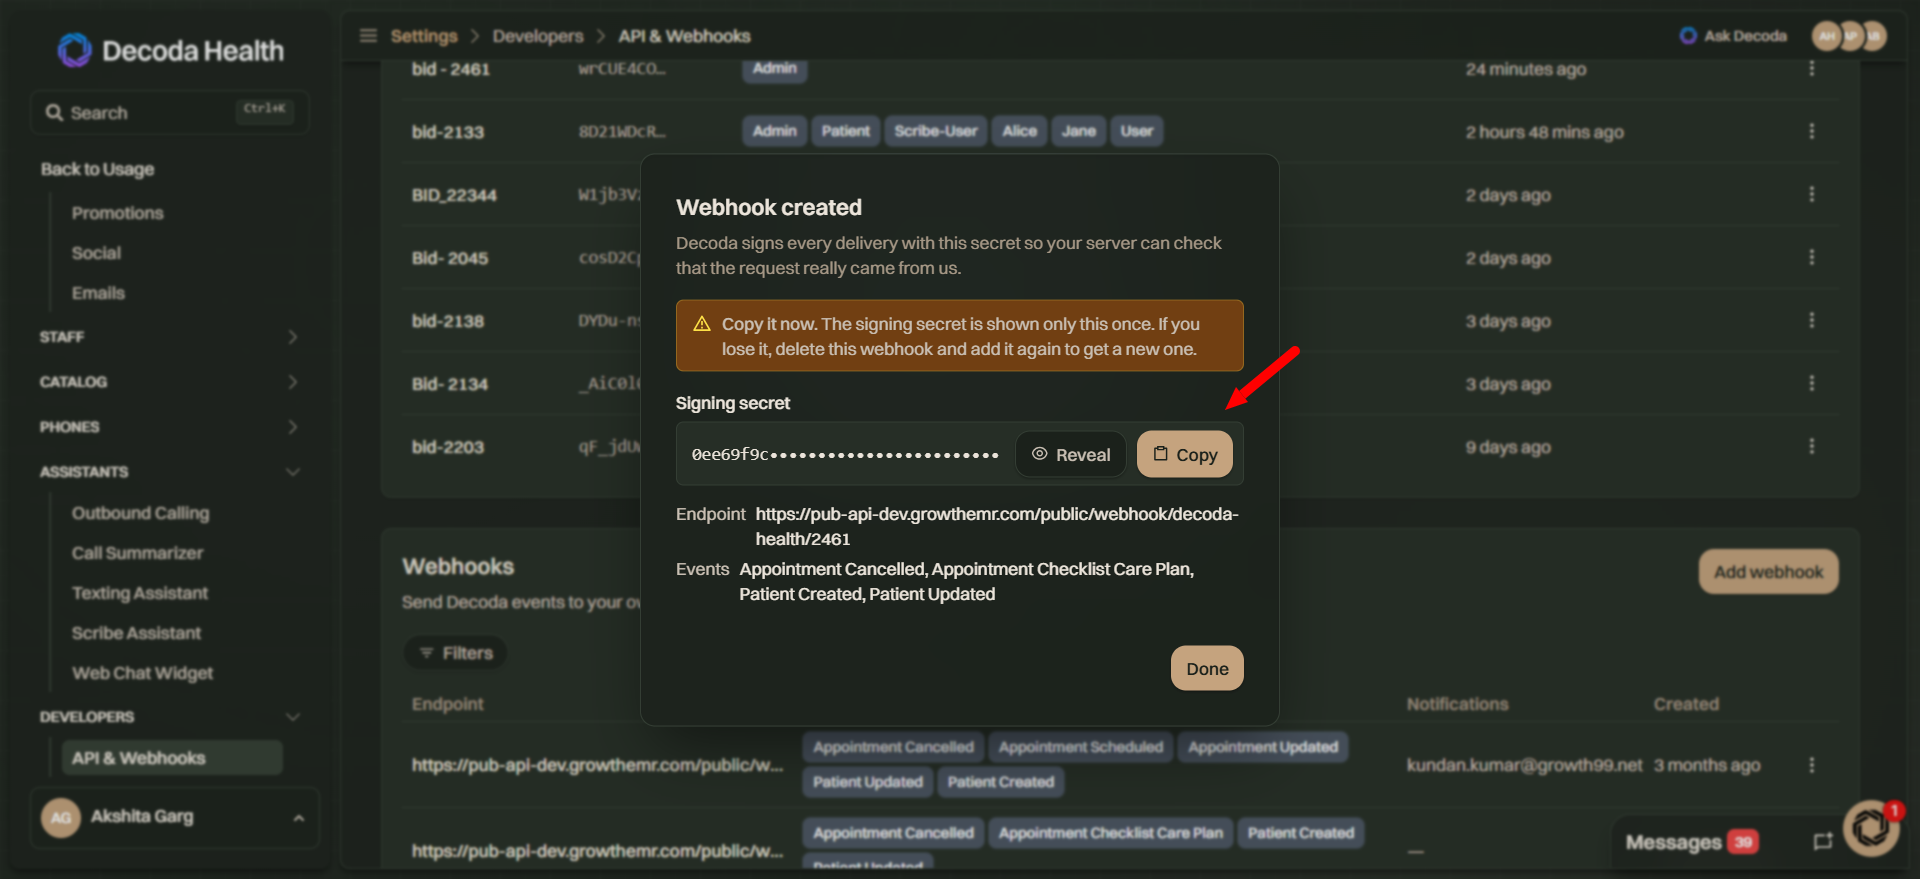
- Save the webhook, then copy the signing secret.
|
Important Decoda Health displays the signing secret only once. Copy it immediately — if you lose it, you'll need to delete the webhook and create a new one. |
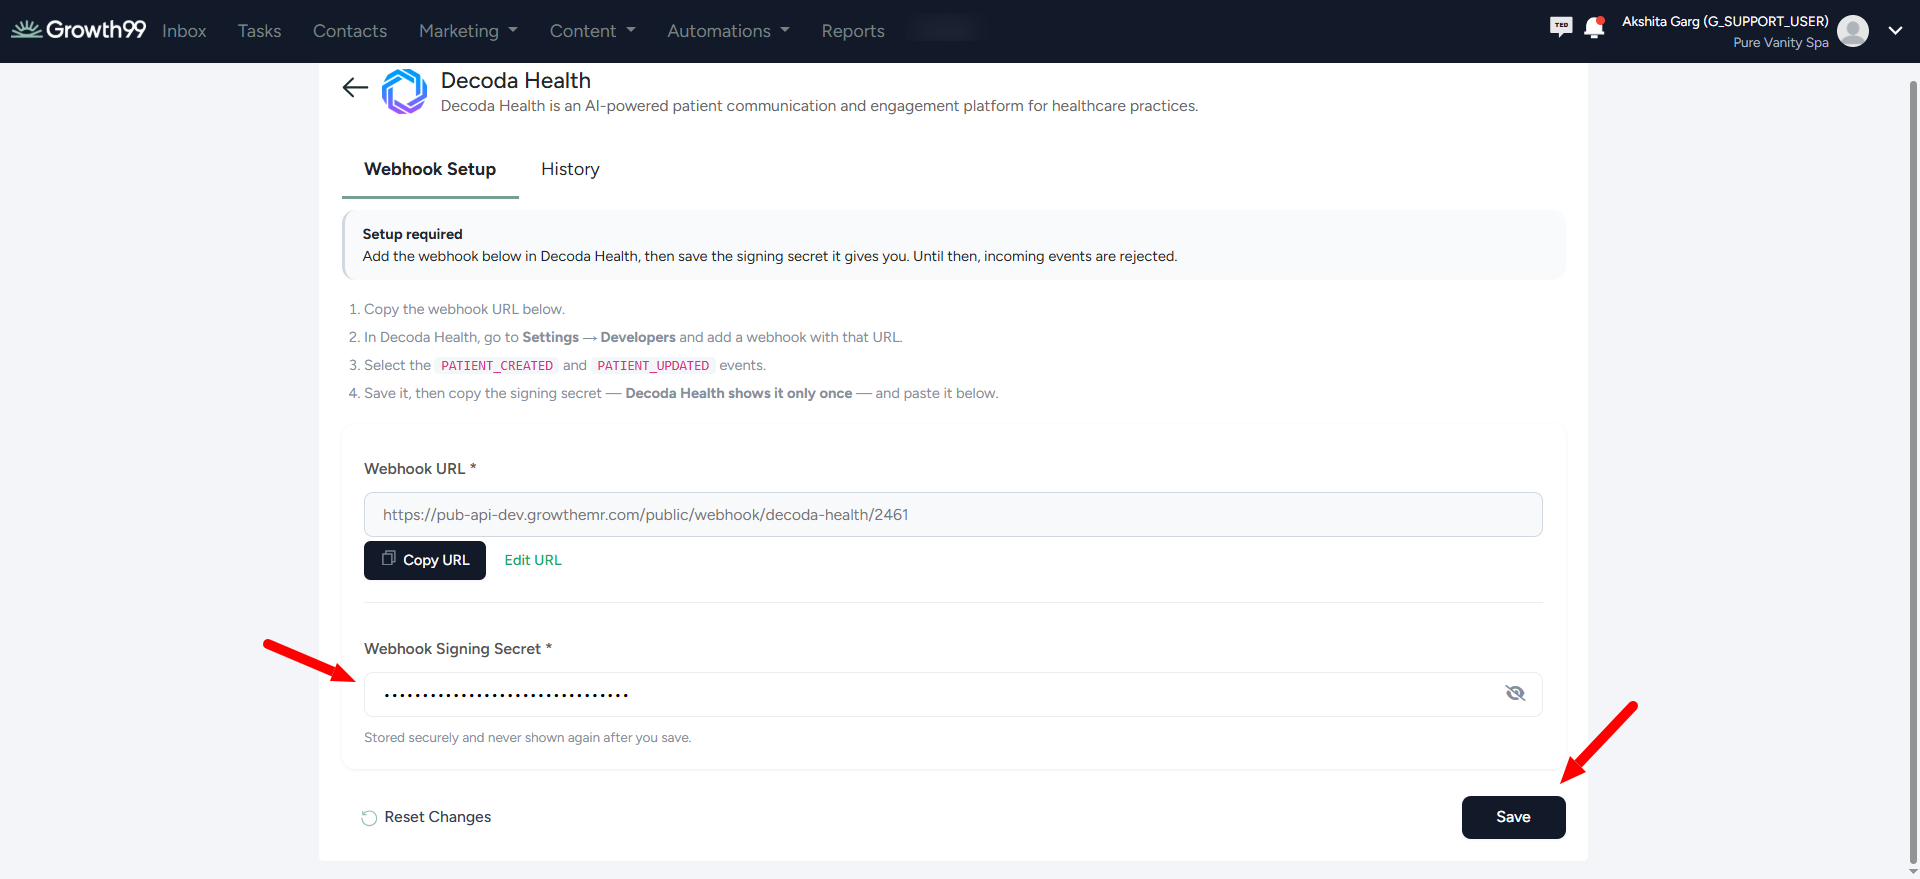
- Return to Growth99+, paste the signing secret into the Webhook Signing Secret field on the Decoda integration page, and click Save.
|
Heads up Incoming data is now live. Until you save the signing secret, incoming events from Decoda will be rejected. |
Step 3: Set up outgoing data to Decoda
This is how contacts move from Growth99+ into Decoda.
- In Growth99+, open the Data Outgoing tab and click Connect for Decoda Health.
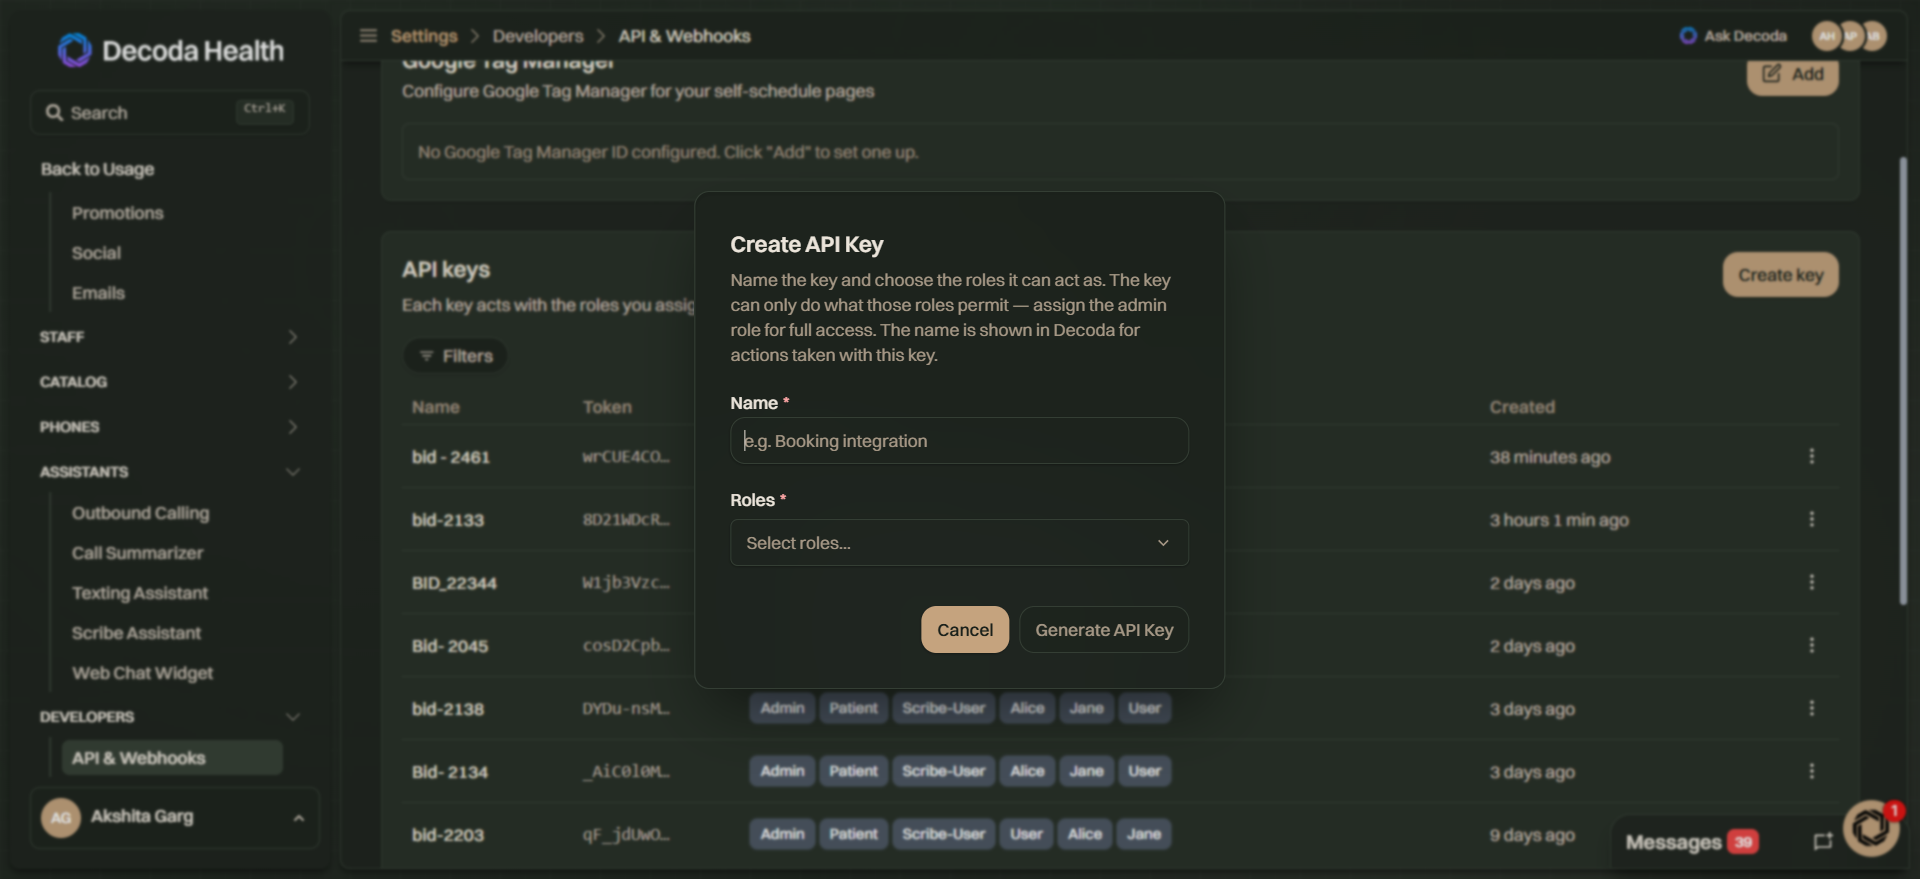
- In Decoda Health, go to Settings → Developers → API & Webhooks and click Create key.
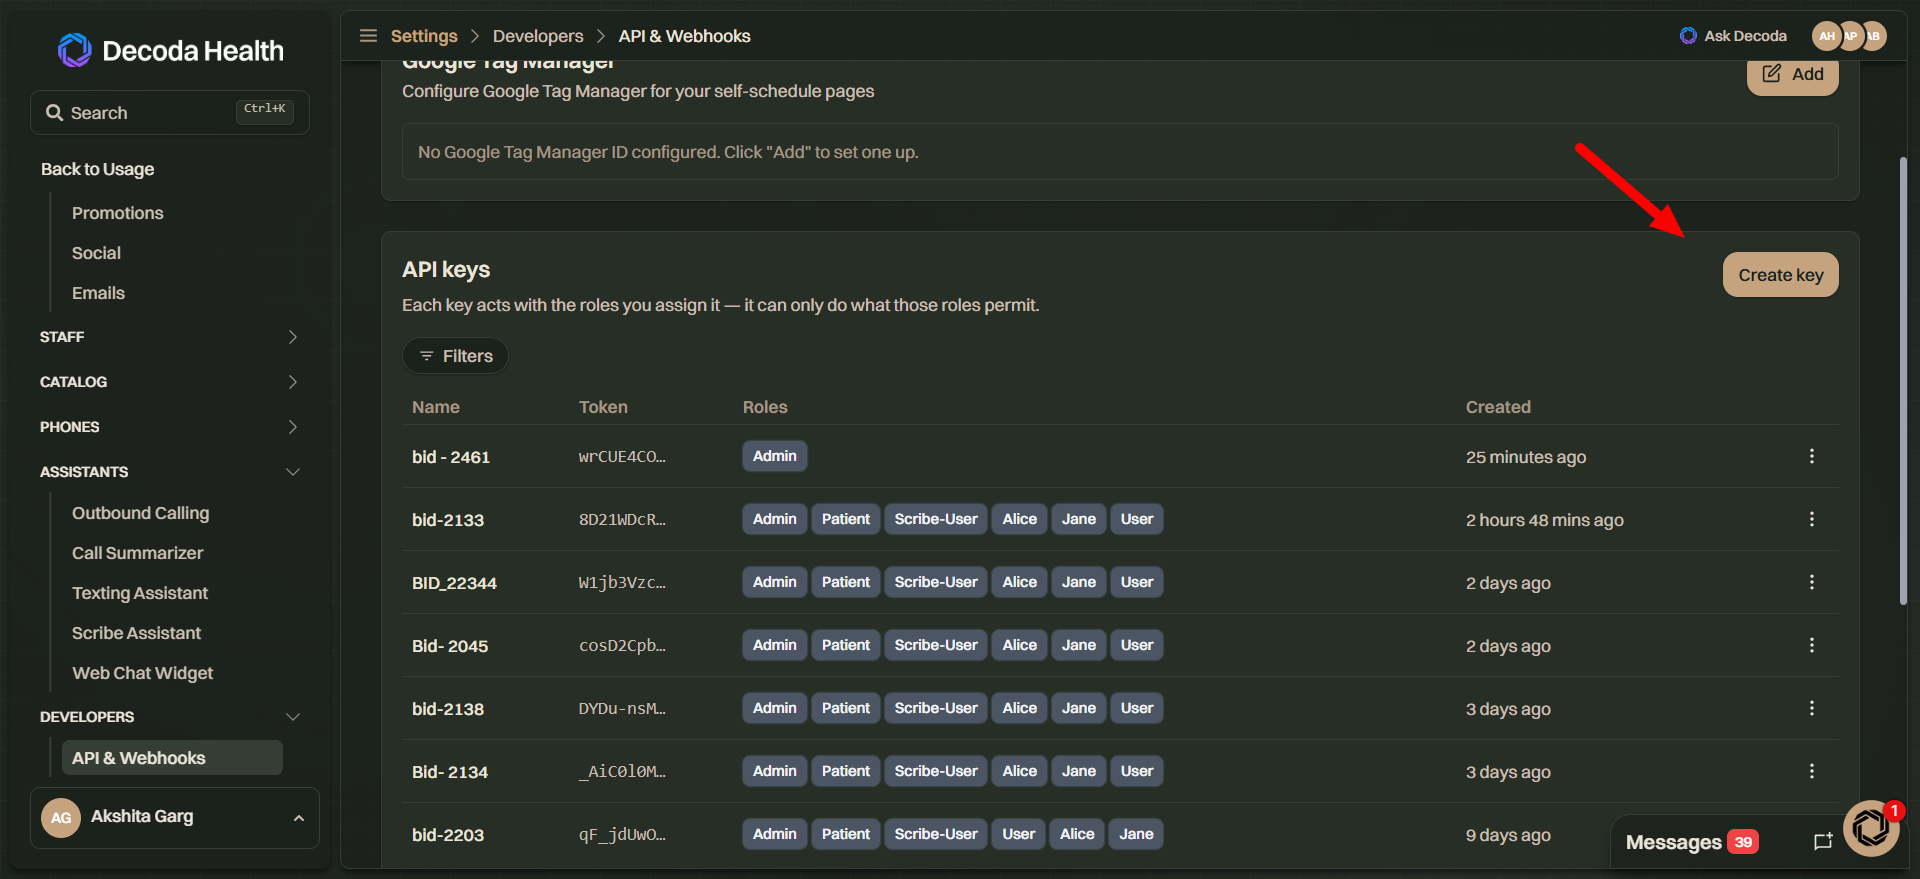
- Name the key, assign the Admin role, and click Generate API Key.
- Copy the generated API key and paste it into the API Key field on the Growth99+ Decoda integration page. Click Save.
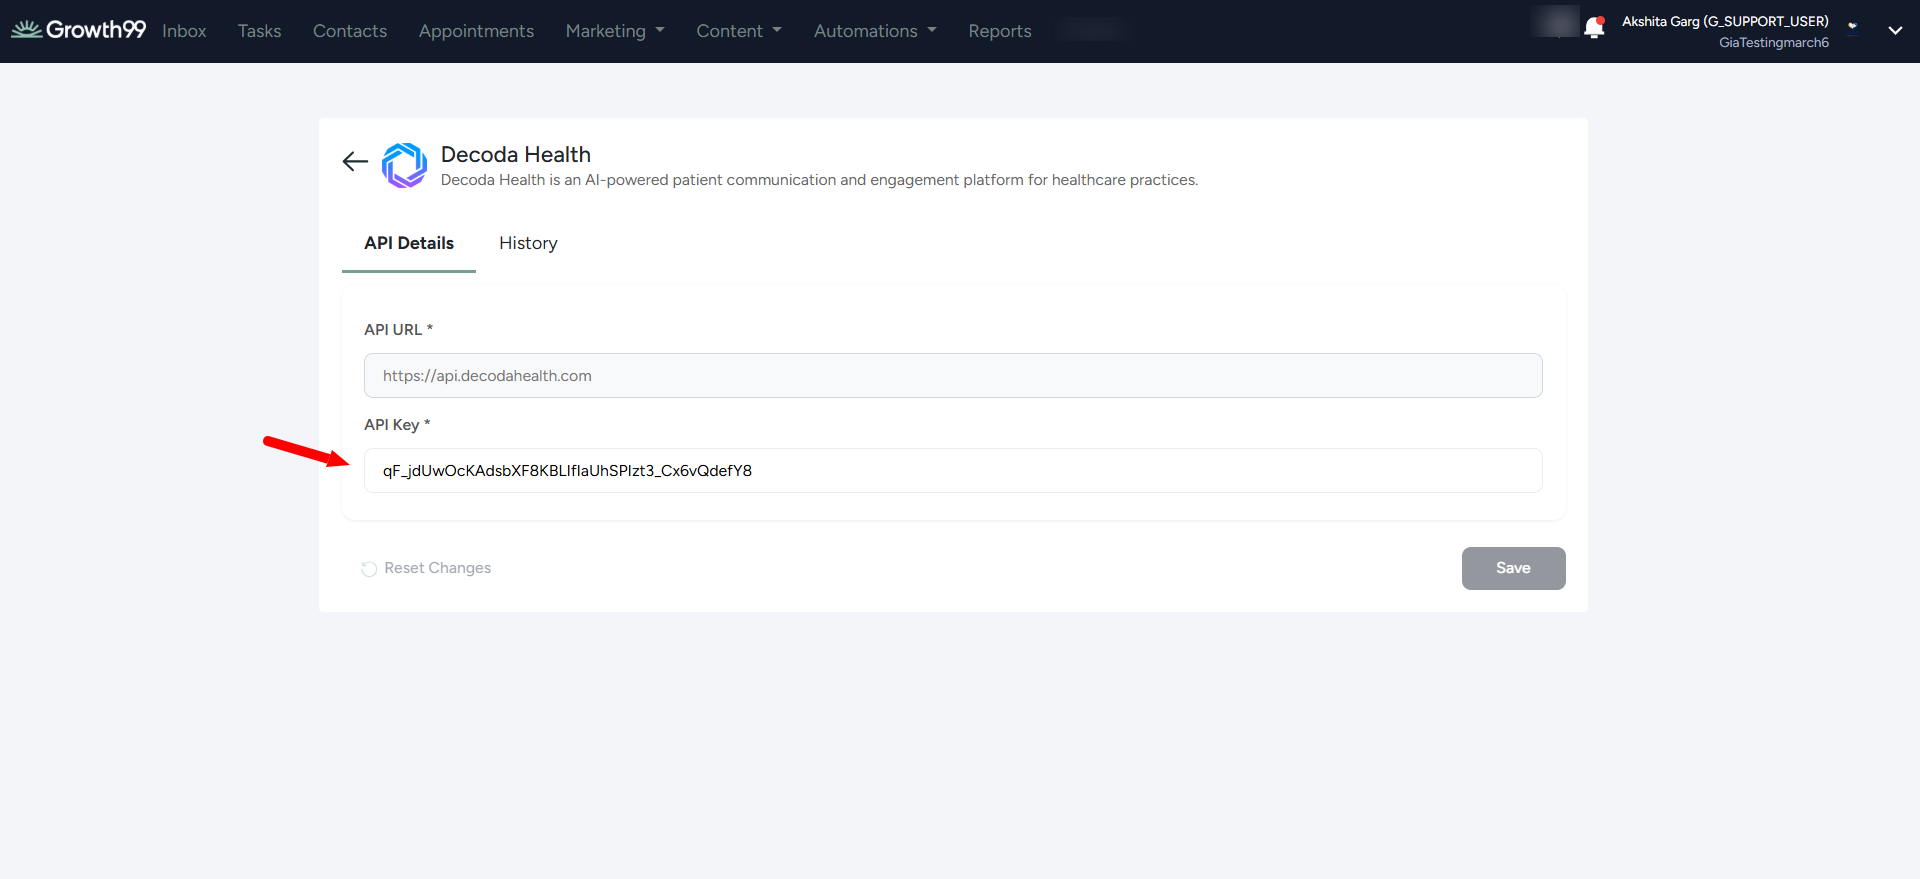
Outgoing data is now live.
Step 4: Manage the integration & view history
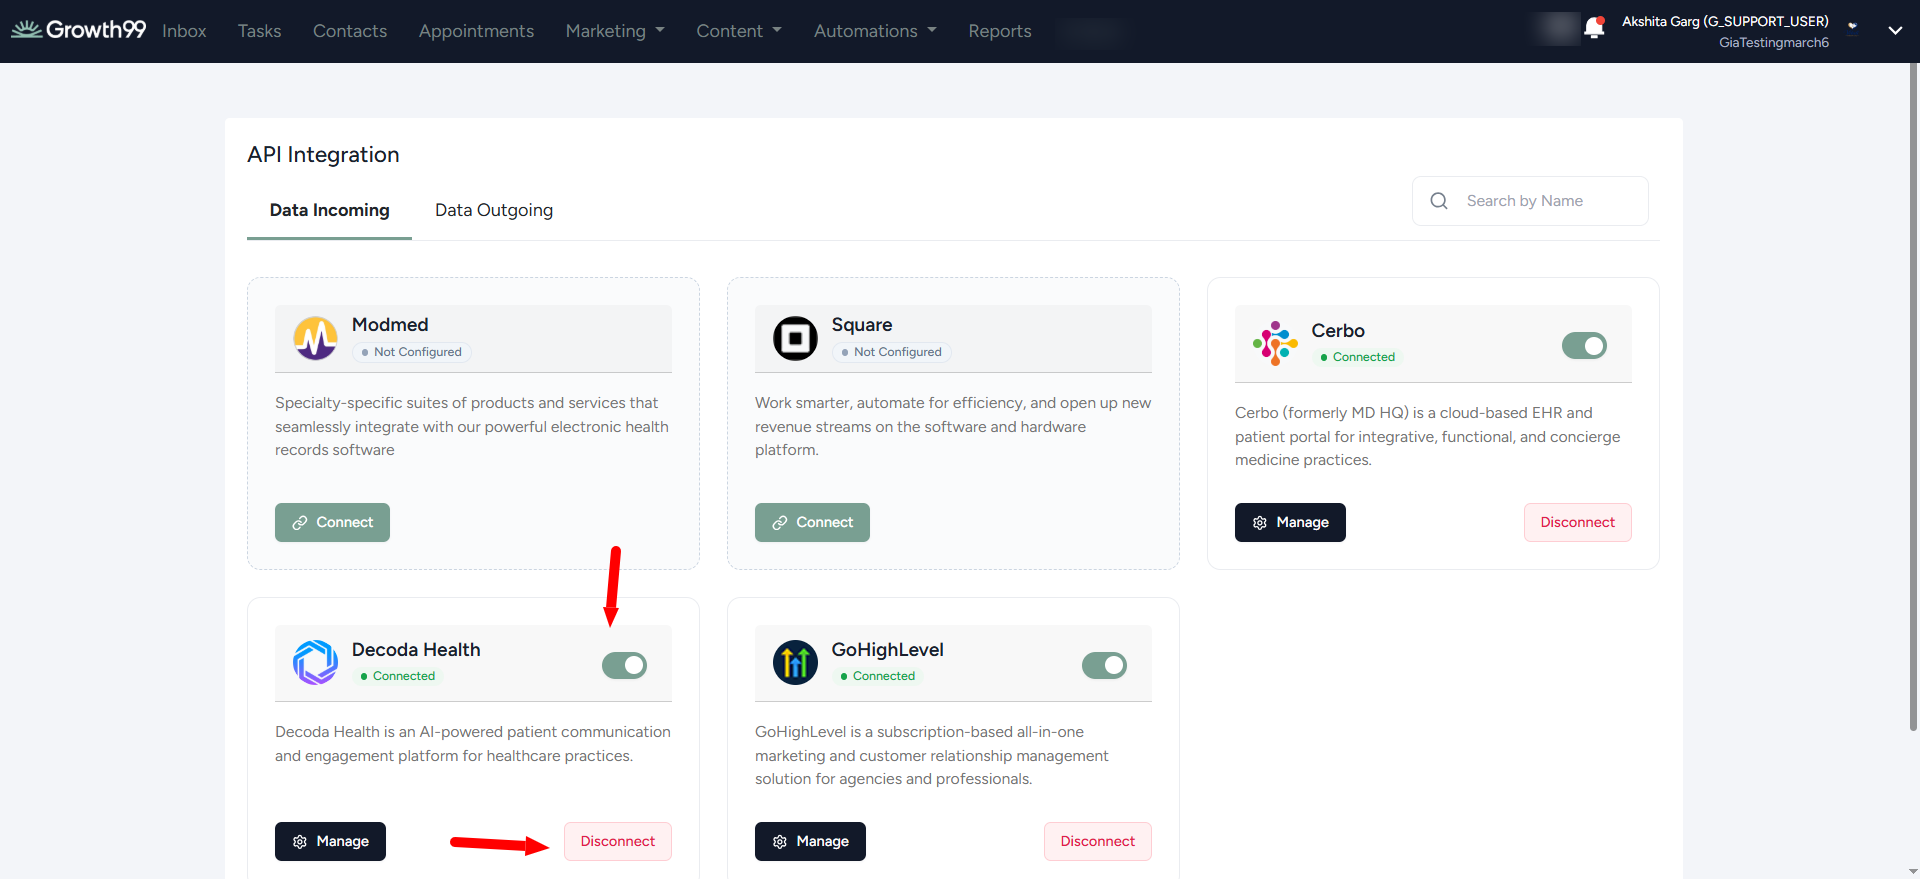
Once both connections are established, you can manage, disable, or disconnect the integration at any time from the Third-Party Integrations page.
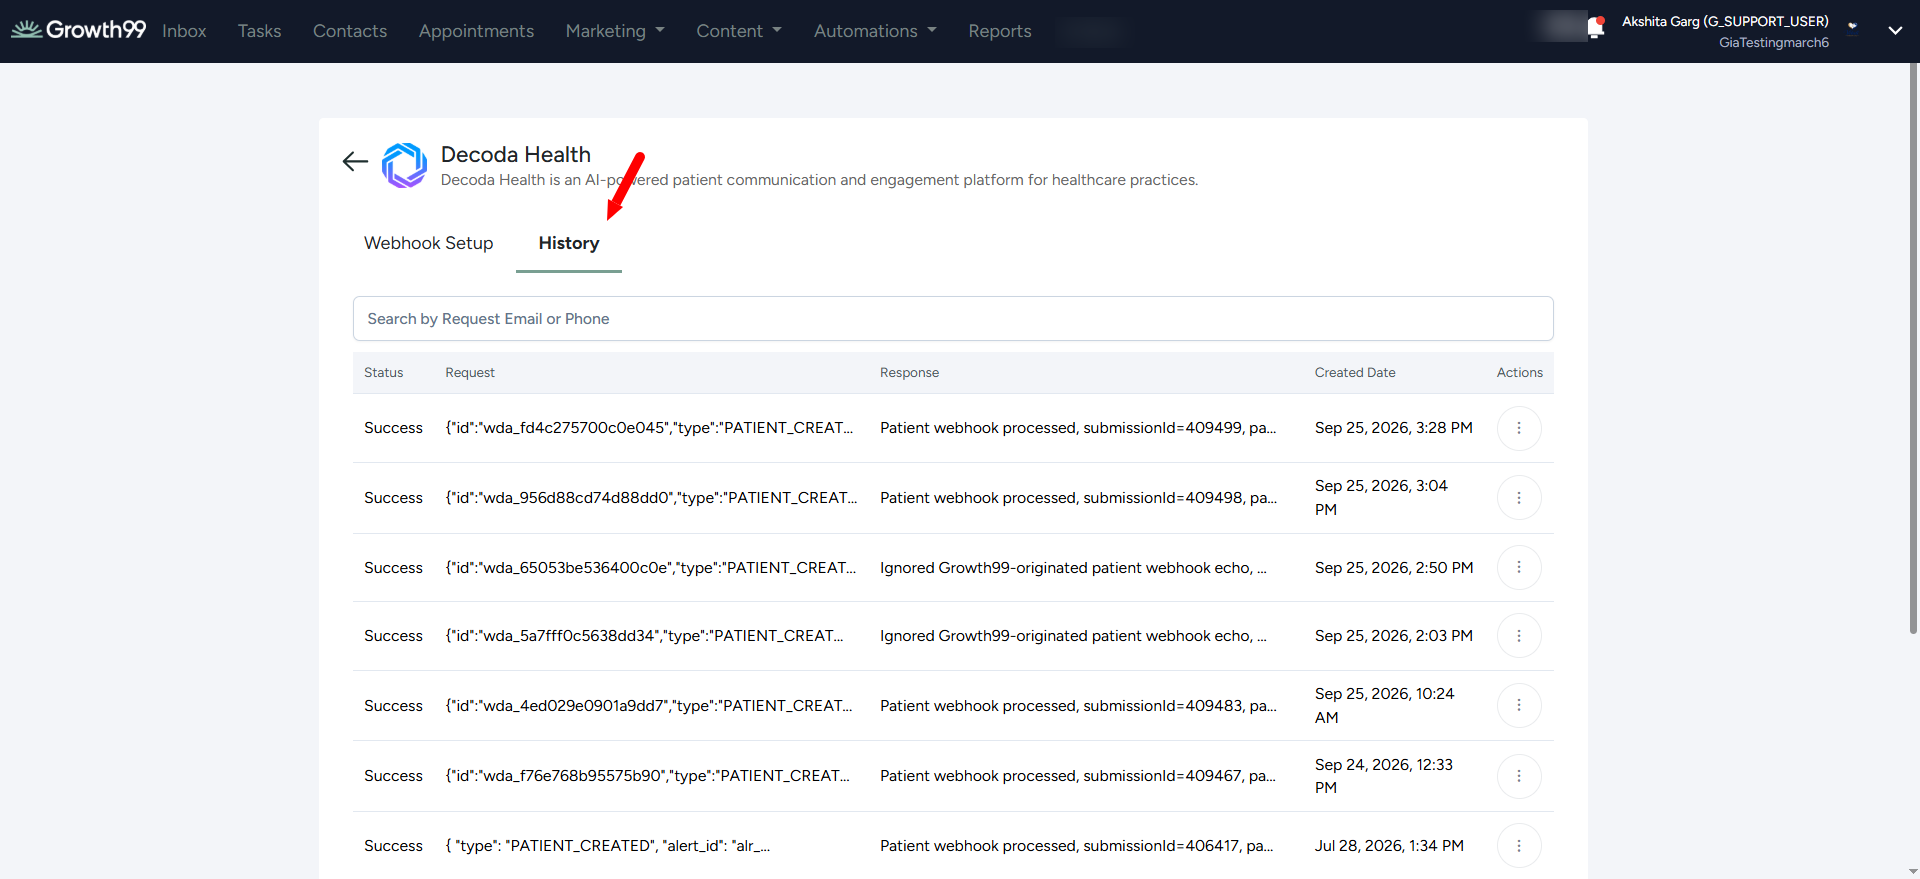
You can also open the History tab on the Decoda integration page to track every incoming and outgoing event between Growth99+ and Decoda — useful for troubleshooting a specific patient record or confirming data flowed through.
Need help?
If anything looks off during setup — the webhook won't save, the signing secret was lost, or you don't see expected records in the History log — reach out to your Growth99 support contact or submit a ticket from the Support Tickets menu in Growth99+.